
Universal Lock Key 3
Get to know the three key modes, then switch between them to install and remove your Professional Series locks.
User Guides / Universal Lock Key 3

Universal Lock Key 3
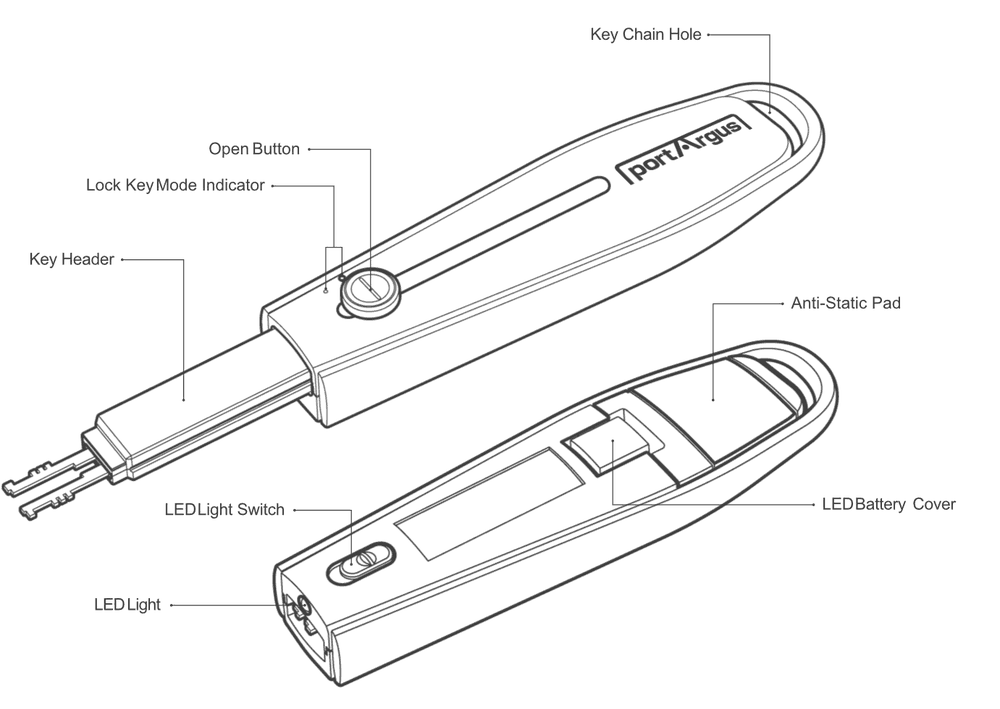
The key that installs and removes locks of the portArgus Professional Series. Some products use a separate dedicated key.
Parts of the Key
Specification
| Product | Universal Lock Key 3 (CSK-U30) |
|---|---|
| Dimensions | W × H × L (Depth): 33.30 × 16.00 × 115.00 mm (1.31 × 0.63 × 4.53 in) |
| Weight | 71.0 g (2.50 oz) |
• The key is directional. Insert it completely, to the end, in the right direction.
• Be careful not to injure your hands on the sharp metal key blades. Keep the key in Storage mode
when not in use.
• The key blades can be separated for compact use. To request one, please
contact us.
• The manufacturer is not responsible for any problems caused by disassembling the key (including
being unable to identify the key serial number, or loss of parts).
Key Modes

Insert/Removal mode
Slide the button completely forward to insert the key into a lock or to remove the key from the lock.

Retrieval mode
With the key inserted, slide the button backward to switch to Retrieval mode. The key header opens and engages the lock so you can remove it.

Storage mode
Slide the button completely backward to protect the key blades after use.
Switching Modes

Insert/Removal mode → Retrieval mode
Press the key button and, keeping it pressed, slide it backward as shown.

Retrieval mode → Insert/Removal mode
Press the key button and, keeping it pressed, slide it forward as shown.

Retrieval mode → Storage mode
Press down on the top of the key button with your finger and slide it backward to the end.
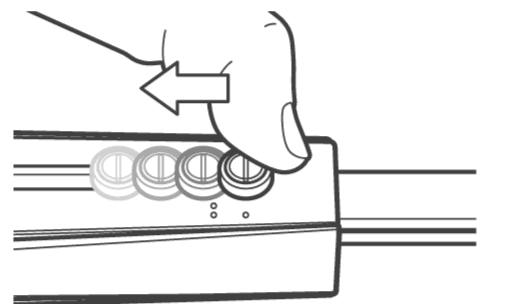
Going straight from Insert/Removal mode to Storage mode can be difficult if you push the top of the key button all the way back. Switch to Retrieval mode first, then to Storage mode, one step at a time.
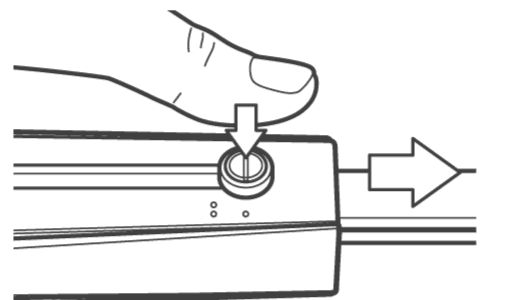
If the button is in Insert/Removal mode but you are not pressing it, the key blades can be pushed back as you insert the key. Keep the key button lightly pressed while inserting the key into the key hole.